Thursday, July 28, 2011
One Tough Layout
Red Bag Crazy Love
Sketch: Creative Scrappers Sketch #157
Supplies:
Patterned Paper: American Crafts
Paper Ribbon: K & Co
Journaling tags and chipboard letters: Heidi Swapp
Rub ons: Luxe Designs, Daisy Hill, Fancy Pants
Brads: My Minds Eye
Cardstock Sticker: Crate Paper
Divine Twine
Jenni Bowlin ink
Stamps: Ali Edwards for Technique Tuesday
Stickles - xmas red, diamond
American Crafts thickers
Tim Holtz Crackle Paint
Monday, July 25, 2011
Mastering the Machine for the Master of the Grill
Over the Fourth of July weekend I made my first items: an apron and matching chef’s hat for my very on Grill Master Mark. He wore them the entire time he grilled and was in the kitchen that weekend. I didn’t do a great job, and it’s a little big, and the flame fabric runs upside down on the hat, but I was pretty proud of my first try.
I intend on cutting a witty, grill-appropriate saying with my Silhouette for the bib, but I have to order some of their cut-able, fuse-able vinyl. Use your imagination for now.
Thursday, July 21, 2011
Christmas in July – Week 3
Something about the unbearable heat and humidity of South Alabama in combination with a record drought are really motivating me to get out the Christmas photos and use paper with snowmen and snowflakes!
Even though its tough to tell from the photos, this layout is of Ozzy and his Christmas present this last year. For once, he actually liked it, and it was destroyed within the week.
Christmas Kitty
Inspiration: Becky Williams layout here
Supplies
Scenic Route patterned paper; American Crafts patterned paper, cardstock; Creative Imaginations patterned paper, journaling card; Bo Bunny patterned paper; Cosmo Cricket chipboard; K & Company sticker; Mary Engelbriet rhinestone sticker; Echo Park letter stickers.
Wednesday, July 20, 2011
Wednesday Accountability: Trying Something New
If you are familiar with Weight Watchers, you know that in the past year or so they revamped their plan to the new PointsPlus © system, which deemphasizes calories and promotes fruits and vegetables. Ever since I re-joined under the new program, I have struggled to lose any weight. A little investigating found several complaints, particularly from more petite women with fewer pounds to lose. Following some suggestions I found, I started double-counting this week using WW and SparkPeople. I’ve noticed a discrepancy between how much WW says I can eat and the calories and fat that I am actually consuming. And I did lose 1 lb. this week, which is encouraging. I think I’m going to continue to double track for a couple of weeks and see what happens.
Weight today: 139.8 lbs. (-1 lb)
Obstacles: House showings threw us off our routine this week, so we ended up eating out unexpectedly a couple of times. Mark made a huge pot of spaghetti carbonara, which is not exactly good for you.
Upcoming obstacles: Travelling out of town for work for the next 2 weeks. This presents both an eating and a fitness challenge.
Monday, July 18, 2011
Pensacola Butterfly Garden
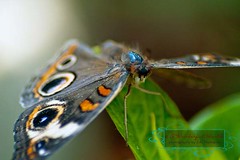
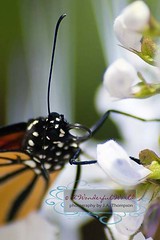
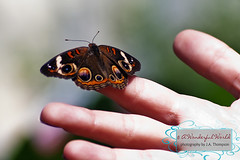
A few weeks back, my sister and I ventured over to Pensacola for the opening day of their butterfly house. She and I share a passion for photography, and couldn’t pass up the opportunity to shoot those little buggers in a confined space. We also made a stop by ScrapHappy, of course.
Thursday, July 14, 2011
Christmas in July – Week 2
Christmas Memories 2010
Sketch: Shimelle Laine 4x6 Photo Love May 2010
Cardstock: Bazzill
Patterned Paper, stickers: Echo Park
Chipboard Sticker: Basic Grey
Punches: Martha Stewart
Wednesday, July 13, 2011
Accountability Wednesday: Feeling discouraged again
I’m feeling pretty down today. I’m up 2 lbs. again, even though I thought I did pretty well over our weekend out of town. My clothes don’t fit. I’ve had a net loss of 0 over the last month. Oh, and I have hives again. Ugh.
I guess I need to add more cardio to my workout routine. Maybe I should drop the yoga. I know I need to work out more, but I’ll be travelling quite a bit for work soon, so exercise and eating right will be tough.
Losing weight on WW the first time around seemed so easy. It took a while to get to goal, but at least there was progress. I’m not seeing any progress at all this time. It’s extremely frustrating, leaving me feeling defeated, depressed and helpless. I just don’t know how to make this work.
Weight right now: 140.8
Exercise this week: yoga (1), Barre Method DVD (1)
Eating Obstacles: Staying on Plan during out of town weekend.
Upcoming Obstacles: None that I know of.
Monday, July 11, 2011
What I’ve learned from Christine Middlecamp
Note to Christine Middlecamp -- if you are ever to stumble on this post, two things. a) I promise I’m not some wacked-out stalker, and b) I hope it’s OK that I feel like I can call you by your first name, since we’ve never met or anything.
It’s no secret that Christine Middlecamp is one of my most favorite, inspiring scrapbookers to follow. I stumbled on her infamous Doily Tutorial about a year ago now, and showed you my version in my very first post.
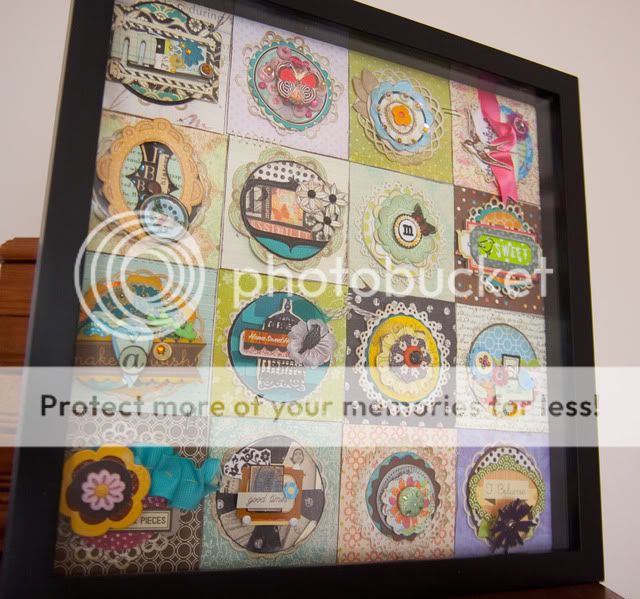
Spend some time exploring Christine’s blog. See for yourself how she is the master (mistress?) of the layering technique. Always clean and simple, never overly busy, and it doesn’t distract from the photos. And no, Christine isn’t paying me for this post!
In the year I’ve been following her blog, I’ve tried to incorporate some of her style and technique into my own scrapbooking. I don’t favor the light, airy tones she does, but I’m attempting to incorporate aspects of her techniques. Here’s some of what I’ve learned from Christine.
1. Layer, layer layer
Christine is the absolute queen of layering, in my humble opinion. Pull from your paper and embellishment stash, and rearrange before you glue them down. Pile on and edit away. Look at your stash in a new way.
2. Pop dots are your friend
Use pop-dots to (pardon the pun) “pop’ elements off the page. This adds separation and dimension to the layers.
3. Make your own 3D embellishments
This is one of Christine’s signature moves. Use paper, coordinating stickers, brads, diecuts, buttons, pearls, and/or bling to layer up (using pop dots, of course) and make your own customized embellishments. Use those die cutters or decorative edge scissors and cut scalloped and plain circles to peak from behind a brad. When in doubt, see #1.
4. Use what you’ve got…
These days especially we are all looking to be a little frugal. And if you’re anything like me, you have stash guilt and hate to waste anything, so you have quite a stash. Look through what you have. Look at it with new eyes. And…
5. …and make it work
You can adapt a lot of things to make them work for your project with a little time and creativity. The sticker above originally said “’10’ things I love!”. I used another small blue sticker from the same sheet, and cut a small “2” from some coordinating patterned paper to make a phrase that I could use.
6. Die-cuts are your other friend
You know them…all those beautiful die cut shapes that you have. You want to use them, but you don’t know what to do with them, especially all the really tiny ones. Diecuts make great foundations and details in layers, making them visually interesting.
7. Don’t be afraid to use your scissors
Christine Middlecamp is not one of those scrappers who is afraid to cut up their stash. Got a rub on that’s just too big? Cut it up. Only like the border of a journaling card? Cut it up. Got a sticker that would make a perfect border? Cut it up. Again, these little details really add to the overall visual.
8. Black cardstock – your OTHER new friend
Ms. Middlecamp loves to outline many elements with black cardstock. Use up those scraps to frame your elements and really make them pop.
9. Incorporate buttons, brads, and bling in ways you never imagined
Who would think to put a rhinestone or pearl on top of a button? Not me, but its something Christine Middlecamp does all the time. Topping off other elements with brads or buttons make a great finishing touch.
10. Windows, chipboard, transparencies…the list goes on
One really neat thing I learned from the Doily Project was using transparencies or paper with chipboard frames and rubons, brads, or stamps to create little “windows”. These elements are really nice in a cluster. I didn’t use them in this particular layout, but I need to use them more.
--------------------------------------------
2 Things I Love
Sketch: Creative Scrappers Sketch 163
Supplies: Cosmo Cricket patterned paper (Circa 1934 – Chaplin, Astaire, Gable, Garbo), sentiments, stickers; DCWV cardstock; October Afternoon mini letters, rubon (honey pie); Basic Grey button; K & Company die cuts, paper tape, bling; Kaisercraft pearl; Maya Road pin; Crate Paper border sticker; Webster’s Pages sparklers (natural tint); Jenni Bowlin Bingo Card; Tim Holtz Distress Ink, tissue tape; Heidi Swapp rubon (fuzzy – love)
Thursday, July 7, 2011
Christmas in July – Week 1
Falalala
Sketch: Ella Publishing Stretch Your Sketch Challenge sketch #4
Supplies:
Cardstock: Bazzill, TPC Studio shimmer cardstock
Patterned Paper: K & Company, Scenic Route
Bling Title: Me and My Big Ideas
Die Cuts: Creative Imaginations
Felt Stickers: Martha Stewart
Snowflake stickers: Jolee’s Boutique
Stickers: Echo Park
Rubons: Making Memories
Chipboard Stickers: Cosmo Cricket
Brads: We R Memory Keepers
Wednesday, July 6, 2011
Accountability Wednesday: I was a Bad Girl
Oh, the July 4th weekend hit me hard. I ate nearly an entire pint of gelato by myself over the course of two days. Mark made his soon to be world famous skirt steak and guacamole. It was fun, and at least I didn’t gain weight this week!
Weight right now: 138.8 (same as last)
Exercise this week: yoga (1), Barre Method DVD (1), stationary bike (20 min), garden work
Eating Obstacles: July 4 weekend
Upcoming Obstacles: Eating away from home this weekend, including a cooking class.
Monday, July 4, 2011
2010 SEC Championship
War Eagle