Showing posts with label Kaisercraft. Show all posts

Monday, July 16, 2012

Incorporating Ephemera

Every time we go on vacation, I come back with tons of maps and tickets and brochures, and I'm always trying to find a way to work them in to my scrapbook pages.  Our tour guide in Budapest gave us this large post card of the Hungarian crown.  I could have slipped it into a 6x12 page protector next to this completed page, but while I was looking at my inspiration page, I realized that the domed shape of the crown mimicked the round center shape, so I replaced the patterned paper with the post card.  I know that its not acid free, and that might not appeal to some people, but my photos are all digital now and backed up in a million places, so I'm not too worried about ruining the prints.  Plus I think it adds to the story.

Crown Jewels


Inspiration

Supplies: Tim Holtz Kraft Resist paper, Distress Ink, alcohol inkAmerican Crafts cardstock, Thickers Cream Soda; Basic Grey Infuse (Extract), Boxer (Slim Fit), rubons, Heritage border sticker; Crafter's Workshop template; Glimmer Mist Chalkboard Ink; Chatter Box alpha stickers; Pink Paislee 6x6 pad; Scenic Route chipboard; VersaMagic Night Sky; KaiserCraft bling and pearl; Studio AE for Technique Tuesday (Are We There Yet?)

Friday, April 13, 2012

This ain't Starbucks

TODAY IS THE LAST DAY TO ENTER!  I'm giving away a seat in Ella publishing's Spring Training 2012!  To learn how you can win, visit this post.
***********

Even though its a bit shabby, everything in Budapest has that European grandeur.  Take this coffee shop for example: gilded elements, painted ceilings, and chandeliers.  And it was upstairs from basically a Barnes and Nobel.

I loved using the one bottle of October Afternoon sprinklers I own with Tim Holtz kraft resist paper.  I adapted a Sketches for Scrapbooking sketch to showcase only 3 photos and a business card, and the element on the resist paper in the center. 


 Sketch: Sketches for Scrapbooking vol. 5

Supplies: Crate Paper Portrait (Vintage Lace, die cuts, border stickers); Tim Holtz Kraft Resist; Core'dinations Graphic 45; Basic Grey Granola (Trail Mix), letter stickers; 7Gypsies 6x6 paper pad (Venice), 97% Complete stickers (Travel Voyage); Lily Bee letter stickers; My Minds Eye Stella and Rose Hattie "Happy" Label stickers, Gertie "Delightful" decorative brads; American Crafts Mementos ; Imagination Project Cardstock Stickers (Yesterdays Vintage Note); K and Co Die Cut; Bo Bunny  dimensional stickers, brads; Provocraft Etcetera Cardstock Stickers;  Basics by Kaisercraft Pearls; Studio Calico Mister Huey; October Afternoon Sprinklers

***For 12% off any purchase at Stop and Scrap, use the code FEATHERS***  

Thursday, September 29, 2011

The "Uh-Oh" Moment

You might have noticed if you've followed the blog for a little while, we have no children, but we do have a cat.  THE cat.  Ozzy.  Up until this summer, I think that Ozzy truly believed he was the Only Cat in the World.  He's an indoor cat, and even when other cats would wander into the yard, he would pretend not to see them.

But when we put the house on the market, Ozzy couldn't stay at the house during open houses, in case people were allergic, and because he demands all the attention from any human in his vicinity.  So we put on his outdoor exploring gear, a.k.a. a leash and harness -- yes, we are THOSE people!-- and plopped him in the car for a little ride.  A 14 lb. cat is hard to get into a carrier, so the harness is easier.  We made a stop by my office, and when we did, the cat that hangs out there made an appearance.  Well, Ozzy found out quick that he was NOT the only kitty, and I think the look on his face in these pictures is priceless!

Only Kitty


Sketch Support One-Page Sketch #9


Basic Grey Junebug (Fresco, Kaleidoscope, Glazed Brads), Marrakech (Calming Moon, Chai), Basics label stickers (white)
Making Memories Boho Chic Alphabet (Cream)
Jenni Bowlin ink (Spice Tin)

Thursday, August 11, 2011

Missing How Things Used to Be

I was a very lucky girl growing up.  My family owned a small cottage at the beach, where I spend pretty much every weekend and all summer.  But I didn’t know how lucky I was.  You see, I just thought it was the normal thing to do: pack up every Friday after Mr. Rogers and go for a 2 hour drive, to spend the weekend playing in the sand and never changing out of my bathing suit.  To scoop up crabs and catch shrimp and boil them that night for dinner the next.
But time and age took its toll, and the house took many beatings from hurricanes.  Beach houses, even small, 1 bathroom cottages, are expensive to fix and to keep.  So it was sold.  And with it went an innocent, simple time before tremendous coastal development where we were the only ones for miles on the beach.  Beach houses involve a very different way of life now.

The Beach House


Patterned Paper: Basic Grey, Cosmo Cricket, Fancy Pants, Target Dollar Spot; Stickers: Crate Paper; Fabric Flowers: Prima; Paper flowers: Making Memories, Prima; Chipboard Letters: Miss Elizabeth’s, American Crafts; Sticker letters: Cosmo Cricket; Bird charm: Tim Holtz; Word sticker: K & Company; Buttons: Jenni Bowlin; Pearls: Kaisercraft; Tattered Angels Chalkboard Glimmer Mist; Ali Edwards for Technique Tuesday stamps; Versamagic and Rubber Stampede inks.

Monday, July 11, 2011

What I’ve learned from Christine Middlecamp


Note to Christine Middlecamp -- if you are ever to stumble on this post, two things. a) I promise I’m not some wacked-out stalker, and b) I hope it’s OK that I feel like I can call you by your first name, since we’ve never met or anything.

It’s no secret that Christine Middlecamp is one of my most favorite, inspiring scrapbookers to follow.  I stumbled on her infamous Doily Tutorial about a year ago now, and showed you my version in my very first post

Spend some time exploring Christine’s blog. See for yourself how she is the master (mistress?) of the layering technique.  Always clean and simple, never overly busy, and it doesn’t distract from the photos.  And no, Christine isn’t paying me for this post!

In the year I’ve been following her blog, I’ve tried to incorporate some of her style and technique into my own scrapbooking.  I don’t favor the light, airy tones she does, but I’m attempting to incorporate aspects of her techniques.  Here’s some of what I’ve learned from Christine.

1. Layer, layer layer

Christine is the absolute queen of layering, in my humble opinion.  Pull from your paper and embellishment stash, and rearrange before you glue them down.  Pile on and edit away.  Look at your stash in a new way.

2. Pop dots are your friend


Use pop-dots to (pardon the pun) “pop’ elements off the page.  This adds separation and dimension to the layers.

3.  Make your own 3D embellishments


This is one of Christine’s signature moves.  Use paper, coordinating stickers, brads, diecuts, buttons, pearls, and/or bling to layer up (using pop dots, of course) and make your own customized embellishments.  Use those die cutters or decorative edge scissors and cut scalloped and plain circles to peak from behind a brad.   When in doubt, see #1.

4.  Use what you’ve got…


These days especially we are all looking to be a little frugal.  And if you’re anything like me, you have stash guilt and hate to waste anything, so you have quite a stash.  Look through what you have.  Look at it with new eyes.  And…

5. …and make it work


You can adapt a lot of things to make them work for your project with a little time and creativity.  The sticker above originally said “’10’ things I love!”.  I used another small blue sticker from the same sheet, and cut a small “2” from some coordinating patterned paper to make a phrase that I could use.


6. Die-cuts are your other friend


You know them…all those beautiful die cut shapes that you have.  You want to use them, but you don’t know what to do with them, especially all the really tiny ones.  Diecuts make great foundations and details in layers, making them visually interesting.

7. Don’t be afraid to use your scissors

Christine Middlecamp is not one of those scrappers who is afraid to cut up their stash.  Got a rub on that’s just too big?  Cut it up.  Only like the border of a journaling card?  Cut it up.  Got a sticker that would make a perfect border?  Cut it up.  Again, these little details really add to the overall visual.

8. Black cardstock – your OTHER new friend

Ms. Middlecamp loves to outline many elements with black cardstock.  Use up those scraps to frame your elements and really make them pop.

9.  Incorporate buttons, brads, and bling in ways you never imagined


Who would think to put a rhinestone or pearl on top of a button?  Not me, but its something Christine Middlecamp does all the time.  Topping off other elements with brads or buttons make a great finishing touch.

10.  Windows, chipboard, transparencies…the list goes on

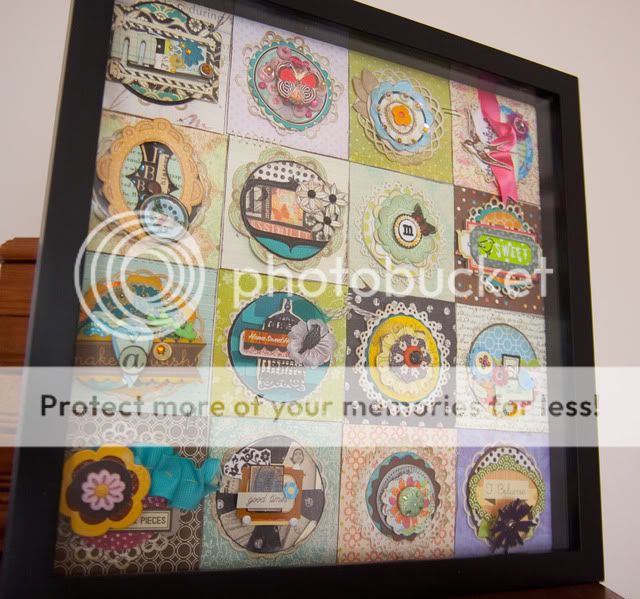
One really neat thing I learned from the Doily Project was using transparencies or paper with chipboard frames and rubons, brads, or stamps to create little “windows”.  These elements are really nice in a cluster.  I didn’t use them in this particular layout, but I need to use them more.

--------------------------------------------

2 Things I Love


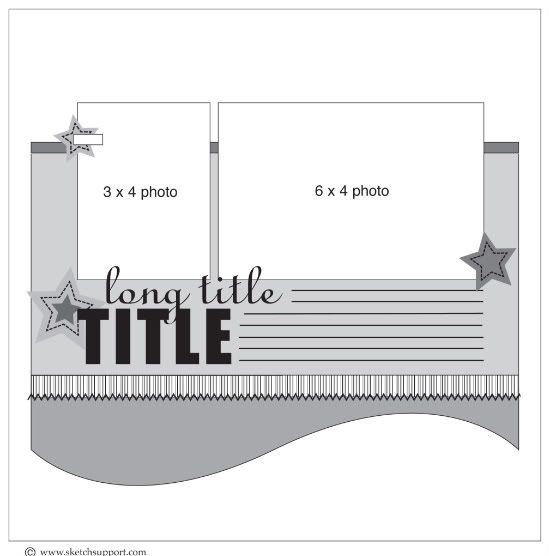
Sketch: Creative Scrappers Sketch 163

Supplies: Cosmo Cricket patterned paper (Circa 1934 – Chaplin, Astaire, Gable, Garbo), sentiments, stickers; DCWV cardstock; October Afternoon mini letters, rubon (honey pie); Basic Grey button; K & Company die cuts, paper tape, bling; Kaisercraft pearl; Maya Road pin; Crate Paper border sticker; Webster’s Pages sparklers (natural tint); Jenni Bowlin Bingo Card; Tim Holtz Distress Ink, tissue tape; Heidi Swapp rubon (fuzzy – love)

LinkWithin

Related Posts Plugin for WordPress, Blogger...