Monday, November 29, 2010

The Creative Process: Photo Editing Workflow

Shooting and processing my photos are as important or more important to me as the scrapbook pages I create with them.  I shoot almost exclusively in RAW, with my Pentax K100D, unless there's a special situation when I need to use my point and shoot, then of course its a JPEG.


I have both Lightroom 2.2 and Photoshop Elements 7, and like using them both.   I would correct white balance and boost color and sharpening in Lightroom, then export the photos as JPEGs, open them in Photoshop Elements, and color correct, run actions, resize, etc., and save as a final JPEG. I love using presets in Lightroom and actions in PSE to help me along, but I didn't use the LR presets because of the processing I would do in PSE after I exported my photos from LR.  But I was listening to this Paperclipping Digi Show the other day, and it changed my post-processing world! 


I had no idea, but you can select "open in PSE" from the edit menu in LR, edit your photo in PSE and save, and the photo (as a PSD or TIFF) will be pulled back into LR with the PSE edits!  I can combine the effects of actions and presets, do final crops in LR, which I prefer to the crop options in PSE, and add vignettes.  This has streamlined my workflow tremendously, and opened up a world of options.  Another plus: I don't have 187 different versions of the same photo file taking up space on my hard drive!  I used to get so confused on what was finished, what was in process, and what I hadn't touched.  

Now my final step is in LR, and it is to export my completely edited and cropped file to JPEG into my "To Be Printed" folder.  How do you process your photos?

Thursday, November 25, 2010

Myspace Graphics
Myspace Graphics, Thanksgiving Graphics at WishAFriend.com

Monday, November 22, 2010

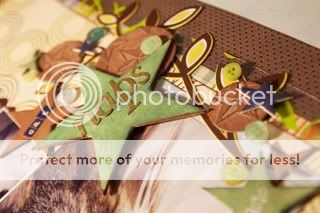
A Day on the Farm

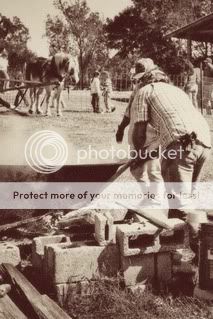
My husband's parents live on a farm, one that has been in his family for generations.  His dad shares the importance of farming with as many as he can, and participates in a non-profit group that holds an Old Time Farm Day on the Thompson property once a year.  They demonstrate old techniques like blacksmithing and mule plowing to the public.  We, of course, go up every year.


Making Sorghum syrup


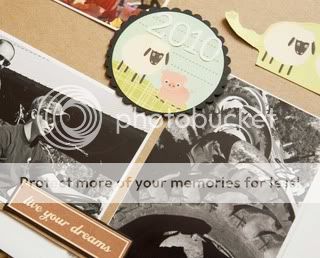
I always end up with a ton of pictures from the event, because there are so many unique photo opportunities!  It's tough to come up with a layout to capture even a few of them.


Old Time Farm Day 2010


Products Used:
October Afternoon - patterned paper, stickers; American Crafts - number stickers


Friday, November 19, 2010

My New Favorite Tool


I picked up this little baby on a Michael's run with a 40% off coupon.  I puffy red heart this tool.  Why?
a.  It's pink
b. The paper piercer is much sharper and thinner than my other one, making it easier to punch holes, and to make smaller holes.
c.  No more ouchies from brad prongs slipping underneath my fingernails.
d.  Did you notice it's pink?

Wednesday, November 17, 2010

I Wish I Had a Cat's Life


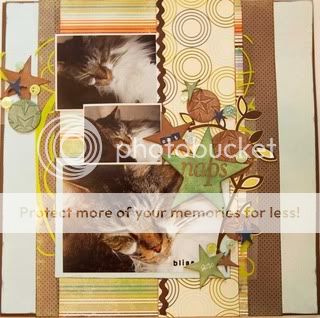
Cat Naps


From Nic Howard's sketch for Color?  Or is it Colour? class for Big Picture Classes.

Products Used:
Scenic Route - patterned paper; My Minds Eye - patterned paper (ancient slab); American Crafts - cardstock; Hambly - transparency; Technique Tuesday - chipboard; Basic Grey - chipboard, stickers, sticker letters; Tim Holtz - grungeboard; Cosmo Cricket - sticker letters; Sakura - souffle pen; Heidi Swapp - rubon; Cat's Eye chalk ink; Versa Magic ink

Tools Used:
Cuttlebug - embossing folder

Monday, November 15, 2010

I Knew I Shoulda Stayed in Bed

By the time I got to work this morning, it was raining so hard I thought I saw Noah passed me in the Ark.  So I got soaked, I mean soaked, from the waist down getting in the office.  If it weren't for my space heater, an industrial size roll of paper towels, and a cup of warm tea, I might have just crawled under my desk and cried.  Those things, and the three Halloween size Twix I ate to comfort myself.

Mark and I decided this weekend that we want a Keurig.  Neither of us drink coffee.  We just think they are so darn cool.

Before the Great Flood of November 2010 rolled in, we had some beautiful weather this weekend, allowing me to take some photos of layouts I've completed the last week or so. 'Bout time, huh?  I can finally share them, like this one:


100% Guard Kitty


I based this layout on this PageMaps Sketch:


Products Used:
My Minds Eye - patterned paper; American Crafts - vinyl letters, chipboard; Target $ Spot - foam letters; Making Memories - stamp, metal tab; Creative Imaginations - stickers; Button from stash; Silhouette - print and cut diecuts; Sakura - souffle pen; Memento - ink; Tim Holtz - distress ink.


Tools Used:
Martha Stewart - punch; EK Success - punch

Wednesday, November 10, 2010

Review: Two Books by Ella Publishing

A few weeks ago, Ella Publishing had a sale going on, which prompted me to make my first purchases.  I've read their great  e-zine for a while now, and was impressed with their free book, the Super Sampler.  I was excited for the opportunity and chose two books, Design Workshop by Lisa Dickenson and Stretch Your Sketches by Donna Jannuzzi.


The tag line for Design Workshop by Lisa Dickenson is "Become a design genius in 10 easy steps."  I like the idea of being a genius, so this caught my attention.  One of the things I feel limits my scrapbooking is my lack of a background in design (did I mention my B.S. degree in Marine Sciences and Biology?).  This e-book is really helpful for anyone dabbling in design principles.  Lisa lays out 10 basic design principles and how to apply them to your pages.  She also throws in some extra bonus tips, so you really get more than just 10.  Lisa describes all of the principles in easy to understand terms.

As with all the Ella Publishing books, the design of the book is nice and clean, the photos are great, and there are lots of beautiful layouts demonstrating the discussion in the book.


Like I mentioned before, I'm a sketch-lover, so of course I was drawn to Stretch Your Sketches by Donna Jannuzzi.  This book is chock-full of great sketches with ideas ranging from following them very literally to how to use them on a different size layout.  Each idea is illustrated beautifully, and *score* there are a ton of sketch variations and bonus sketches in the back!

I really liked both of these books.  For the price, you get a lot of information and inspiration, and I'd recommend these for any scrapbooker, especially for those at the beginner and intermediate levels.

Monday, November 8, 2010

The Creative Process: Sketches

How do you scrap?  What is your process?  Does it start with the photos or the paper?  How to you organize your inspiration?  I'm always interested in a scrapbooker's creative process, and over a series of posts, I'll share mine.

I've already shared my current scrap space with you, at least until we move.  When I scrap, I generally will start with a sketch or a scraplift.  There is some controversy out in Scrapper-land as to whether or not sketches or scraplifting are either the greatest thing since sliced bread or part of the dark side, stealing away a scrapper's creativity.  I land on the side of it being OK.  No matter how a scrapper uses a sketch or another layout to create their own, they will still end up with their own unique creation.  And starting with a layout idea really helps me cut down on the amount of time a layout will take me to complete, particularly if I am working on a very large project, such as one of our vacations to Europe.

My process involves grabbing some photos (more on that in a later post), then finding a sketch or layout in my inspiration files that I can adapt for my photos.  Then I pick out paper and a bunch of embellishments before sitting down to start.

I don't like to have my inspiration sketch/layout sitting in front of me while I'm creating my layout.  I'll look at it a bit, and I might pull it back out to help with the placement of elements, but if I keep it out I tend to use it as too much of a crutch.  I find working from memory allows me to create a layout that is a less literal interpretation of my inspiration.

If you use sketches, where do you find them?  I find a lot on many blogs and websites, like from Allison Davis, and PageMaps.  I also have Becky Fleck's first PageMaps book, and it is fabulous.  Maybe Santa will bring me PageMaps 2!


I find layouts that inspire me all over the place.  The wonderful blogs I read, which you can find on my side bar, and magazines like Scrapbook Trends and Scrapbooks, etc.  are my two main sources.  Soon I'll share how I keep all of it together.

So tell me, what inspiration do you use to scrap? Where do you find it?

Wednesday, November 3, 2010

It's Coming On Christmas

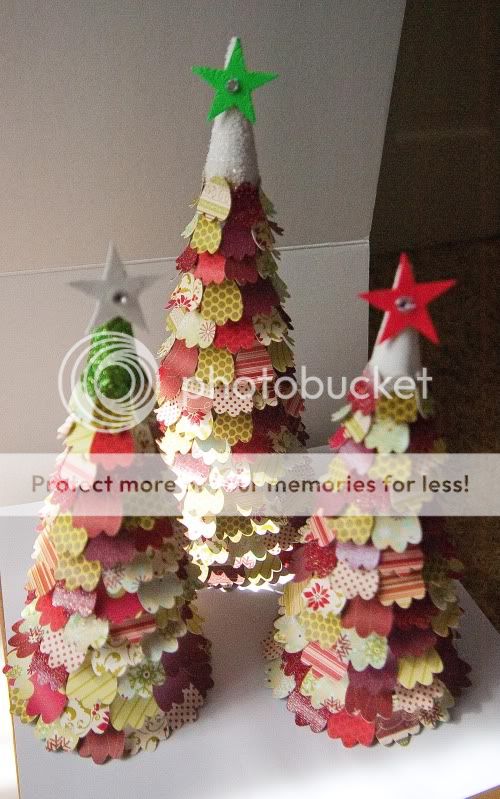
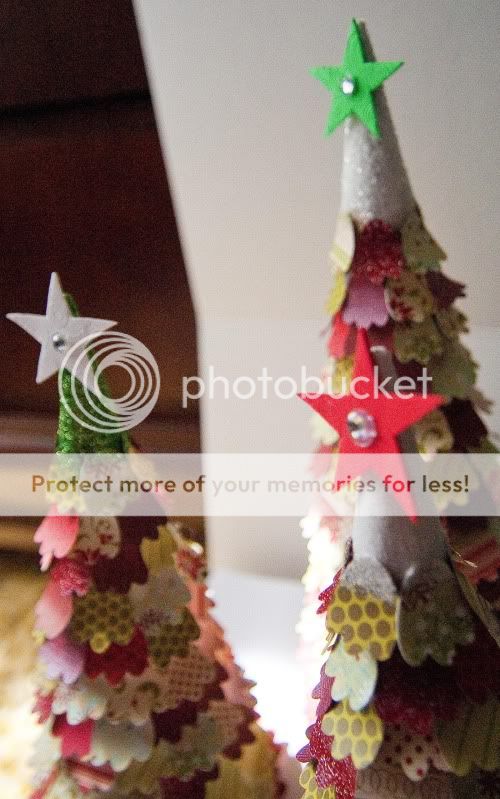
We've made it past Halloween, so I guess its time to start on Christmas (sorry Thanksgiving).  These adorable trees LollyChops made for Cosmo Cricket caught my eye.  I've seen other versions since then, including in the November issue of Scrapbooks, etc.  I figured making the "leaves" would be easy to do with my Silhouette, and indeed it was:


A little paper and alot of hot glue later, and I'm pretty happy with my little trees.

Monday, November 1, 2010

Today's Post is Brought to You by: the Color Red

The Color!  Or is it Colour?  class over at Big Picture Classes is off to a great start!  Our first color assignment was red, and it was suggested we use it as an accent on a more neutral page.  I love red, so this one wasn't a great challenge for me, but it was a challenge to find only red and neutral embellishments in my stash!

Ozzy Magnus


Products Used:  DCWV - Cardstock; Jenni Bowlin - patterned paper, chipboard buttons; Autumn Leaves - patterned paper; Creative Imaginations - stickers; Heidi Swapp - rub on letters; My Minds Eye - transparency; K&Company - transparency; Tim Holtz - grungeboard; Prima - flowers; buttons, tag, crepe paper, flowers and clear embossing powder from stash; Stampabilities ink pad.

Tools used: Tim Holtz Tiny Attacher

LinkWithin

Related Posts Plugin for WordPress, Blogger...