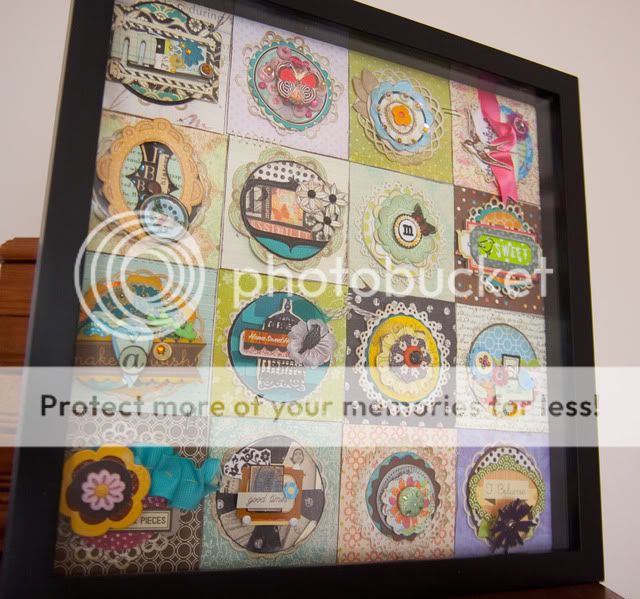
Note to Christine Middlecamp -- if you are ever to stumble on this post, two things. a) I promise I’m not some wacked-out stalker, and b) I hope it’s OK that I feel like I can call you by your first name, since we’ve never met or anything.
It’s no secret that Christine Middlecamp is one of my most favorite, inspiring scrapbookers to follow. I stumbled on her infamous Doily Tutorial about a year ago now, and showed you my version in my very first post.

Spend some time exploring Christine’s blog. See for yourself how she is the master (mistress?) of the layering technique. Always clean and simple, never overly busy, and it doesn’t distract from the photos. And no, Christine isn’t paying me for this post!
In the year I’ve been following her blog, I’ve tried to incorporate some of her style and technique into my own scrapbooking. I don’t favor the light, airy tones she does, but I’m attempting to incorporate aspects of her techniques. Here’s some of what I’ve learned from Christine.
1. Layer, layer layer

Christine is the absolute queen of layering, in my humble opinion. Pull from your paper and embellishment stash, and rearrange before you glue them down. Pile on and edit away. Look at your stash in a new way.
2. Pop dots are your friend

Use pop-dots to (pardon the pun) “pop’ elements off the page. This adds separation and dimension to the layers.
3. Make your own 3D embellishments

This is one of Christine’s signature moves. Use paper, coordinating stickers, brads, diecuts, buttons, pearls, and/or bling to layer up (using pop dots, of course) and make your own customized embellishments. Use those die cutters or decorative edge scissors and cut scalloped and plain circles to peak from behind a brad. When in doubt, see #1.
4. Use what you’ve got…

These days especially we are all looking to be a little frugal. And if you’re anything like me, you have stash guilt and hate to waste anything, so you have quite a stash. Look through what you have. Look at it with new eyes. And…
5. …and make it work

You can adapt a lot of things to make them work for your project with a little time and creativity. The sticker above originally said “’10’ things I love!”. I used another small blue sticker from the same sheet, and cut a small “2” from some coordinating patterned paper to make a phrase that I could use.
6. Die-cuts are your other friend

You know them…all those beautiful die cut shapes that you have. You want to use them, but you don’t know what to do with them, especially all the really tiny ones. Diecuts make great foundations and details in layers, making them visually interesting.
7. Don’t be afraid to use your scissors

Christine Middlecamp is not one of those scrappers who is afraid to cut up their stash. Got a rub on that’s just too big? Cut it up. Only like the border of a journaling card? Cut it up. Got a sticker that would make a perfect border? Cut it up. Again, these little details really add to the overall visual.
8. Black cardstock – your OTHER new friend

Ms. Middlecamp loves to outline many elements with black cardstock. Use up those scraps to frame your elements and really make them pop.
9. Incorporate buttons, brads, and bling in ways you never imagined


Who would think to put a rhinestone or pearl on top of a button? Not me, but its something Christine Middlecamp does all the time. Topping off other elements with brads or buttons make a great finishing touch.
10. Windows, chipboard, transparencies…the list goes on
One really neat thing I learned from the Doily Project was using transparencies or paper with chipboard frames and rubons, brads, or stamps to create little “windows”. These elements are really nice in a cluster. I didn’t use them in this particular layout, but I need to use them more.
--------------------------------------------
2 Things I Love

Sketch: Creative Scrappers Sketch 163
Supplies: Cosmo Cricket patterned paper (Circa 1934 – Chaplin, Astaire, Gable, Garbo), sentiments, stickers; DCWV cardstock; October Afternoon mini letters, rubon (honey pie); Basic Grey button; K & Company die cuts, paper tape, bling; Kaisercraft pearl; Maya Road pin; Crate Paper border sticker; Webster’s Pages sparklers (natural tint); Jenni Bowlin Bingo Card; Tim Holtz Distress Ink, tissue tape; Heidi Swapp rubon (fuzzy – love)

No comments:
Post a Comment